The Professional Residential Painting Process
Thinking of painting your home? While a new coat of color seems simple, the difference between a quick DIY job and a truly flawless, long-lasting finish comes down to the process. For professional painters, the actual application of paint is only a fraction of the work.
Here is the comprehensive, step-by-step process a high-quality residential painting crew follows to ensure your home looks incredible and stays protected for years.
Phase 1: Meticulous Planning and Protection
A great paint job starts long before the brush touches the wall. This initial phase focuses on planning and protecting your home.
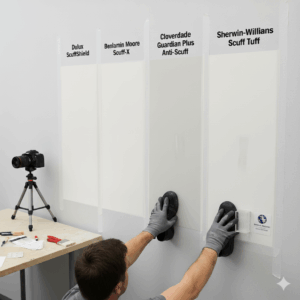
- The Initial Consult: This is where we finalize your vision. We discuss color choices, select the appropriate sheen (e.g., durable semi-gloss for trim, forgiving matte for walls), and choose premium paint products to meet your goals.
- Move, Cover, and Protect: Your home is treated with respect. Large furniture is moved to the center of the room and covered with plastic sheeting. Floors are fully protected with canvas or plastic drop cloths.
- Masking the Details: Painter’s tape is meticulously applied to trim, baseboards, and window frames. We also remove all switch plates and outlet covers to ensure a perfectly clean edge, not painted-over hardware.
Phase 2: Surface Preparation (The Foundation of Quality)
This is the most critical and time-consuming stage. Preparation is 80% of the job. Skipping these steps leads to peeling, cracking, and a rough finish.
- Clean the Walls: Surfaces are thoroughly cleaned to remove years of dust, dirt, and grease. Any residual grime will prevent paint from adhering properly, so walls are cleaned with a mild detergent solution and allowed to dry completely.
- Repair Imperfections: Every crack, hole, and dent is filled with spackle or joint compound. Any gaps where trim meets the wall are neatly filled with caulk.
- Sanding for Smoothness: Patched areas and any rough spots are lightly sanded to ensure a perfectly level surface. The walls are then wiped down or vacuumed to remove all sanding dust, leaving a pristine canvas.
- Priming: A high-quality primer is applied to any patched areas (spot priming) or the entire wall if you’re making a dramatic color change or dealing with stain bleeding. Primer locks in the surface, ensures uniform absorption, and dramatically improves the final color saturation.
Phase 3: Expert Application and Technique
With the surface fully prepared, the painting begins using professional techniques for a seamless result.
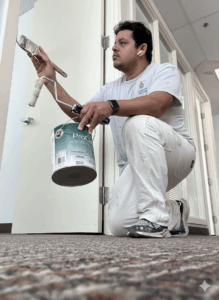
- Ceiling and Trim First: We follow a specific sequence: the ceiling, then the trim and doors, and finally the walls. This prevents drips onto finished surfaces.
- Cutting In: Using an angled brush, the painters carefully “cut in” along all edges, corners, and trim borders. This is a skill honed over years, allowing for a perfectly straight line without solely relying on tape.
- The Rolling Technique: Paint is applied to the main wall area using a roller and extension pole. Painters use a “W” or “M” pattern to distribute paint evenly, followed by light vertical passes.
- Maintaining a Wet Edge: Professionals work quickly and systematically to ensure that the fresh paint always overlaps a still-wet area. This key step prevents “lap marks”—those visible lines that occur when wet paint is applied over a section that has already started to dry.
- Multiple Coats: A professional job always includes a minimum of two finish coats for deep color, maximum durability, and a smooth, even texture. We allow the manufacturer’s recommended drying time between each coat.
Phase 4: Final Inspection and Cleanup
The final phase ensures your home is returned to you in pristine condition, with a perfect result.
- Immediate Tape Removal: Once the final coat is applied, the painter’s tape is removed while the paint is still slightly tacky. This ensures a clean break, revealing the sharp, crisp lines at your trim and ceiling.
- Thorough Cleanup: All drop cloths and plastic coverings are removed, materials are gathered, and the area is meticulously cleaned and vacuumed.
- The Final Walkthrough: The lead painter will walk the space with you to perform a final inspection. We point out the work and encourage you to look closely. Any minor touch-ups are completed on the spot, ensuring the project is signed off only when you are 100% satisfied.
The professional painting process is an investment in quality that pays for itself with a durable, beautiful, and long-lasting finish.
When you choose Casanova Painting, you are choosing a company that is licensed, insured, locally awarded, and committed to transparency at every step. We pride ourselves on the meticulous process and superior customer service that has earned us the Three Best Rated Award for four consecutive years. Stop worrying about cutting corners and start dreaming about your beautiful finished home. Contact us today for a free, detailed quote on your project in Maple Ridge, Pitt Meadows, or Mission!